
Creating paper wallets for Stellar Lumens (XLM) is exceptionally easy. The best and safest way is to create a paper wallet using the official website, Stellar.org. We will be making use of Stellar Account Viewer.
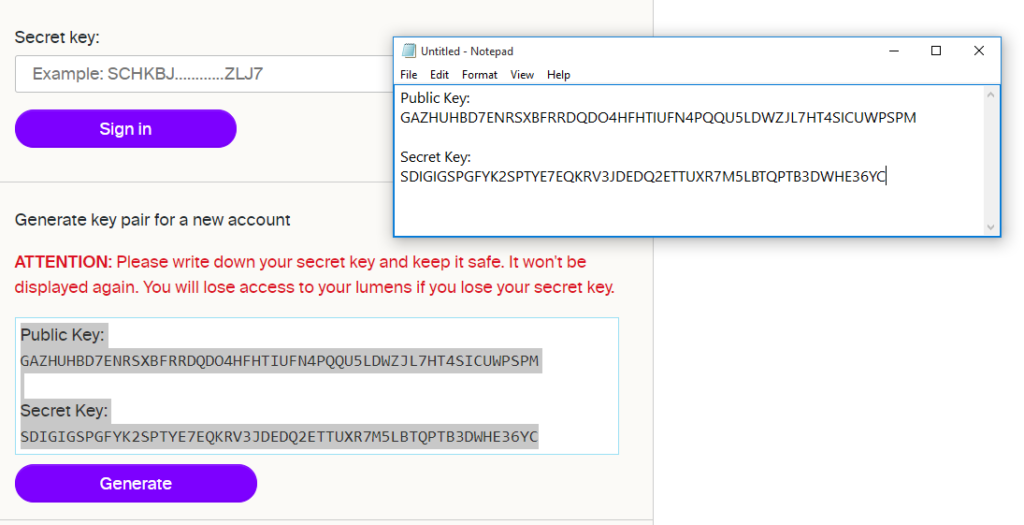
On the Stellar Account Viewer page, you will find a button that says Generate. Click it and it will show you Public key and Secret key.
Public key is your Stellar address that you use to receiving funds. This is what you enter on cryptocurrency exchanges for withdrawing Lumens.
Secret key, as name implies, is meant to be kept secret. Anyone who has your secret key can access funds, including Stellar tokens / assets that you have.
So, make sure to save Secret key in safe place. Since, we are creating a paper wallet for Stellar Lumens, I suggest copying and pasting the entire Public Key and Secret Key on a notepad so that you can print it out for creating paper wallet.
Now, once you have safely stored the paper wallet, you can optionally destroy it. Just make sure nobody ever finds your secret key in order to prevent loss of funds.
To access your account again, you can paste secret key in same Account Viewer.